Remote Projects
Remote projects are projects located in a Matrex Server. The Matrex Server is an console application running on your PC or on a different computer in the LAN.
Working with a remote project is different than working with a local project, because:
- Remote projects can be shared
among different users. This means
that other users can add, update, delete items in the project in the
same time you
are working with it. Matrex makes sure that each client works with the
remote project in a correct and consistent way. If a user changes the
content of the project, all other users connected to the project will
see the change.
- There is the network between the Matrex desktop (client) and the Matrex Server. Networks can be slow or unreliable and this can potentially
result in a slow or unreliable user interaction with the project. Also,
if you work with big matrices (> 10000 cells) the time used for the network to transport the data from server to client and vice-versa can potentially be not trivial.
The reasons to use remote projects instead of local ones are, among others, the following:
- Use a faster or dedicated computer
(e.g. a server computer) to do the projects calculations, which can be
CPU intensive, and in the same time have more resources available (CPU, memory) on your own PC.
- Share a project with other users and interact with the project simultanously.
To open or create a remote project, the first thing to do is to connect to the Matrex Server where the project is supposed to run.
Connect to a server
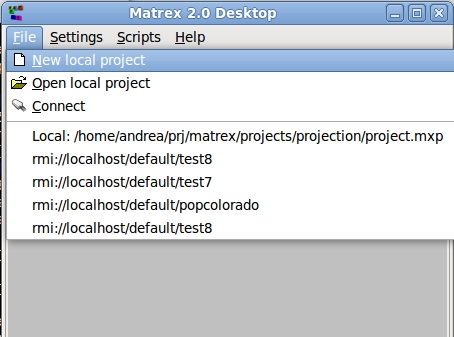
To connect to a Matrex Server click on the File->Connect menu:
The connection process consists in entering the computer address and the server name in the Connect Dialog and, if it is possible to connect to the server, logging in to it.
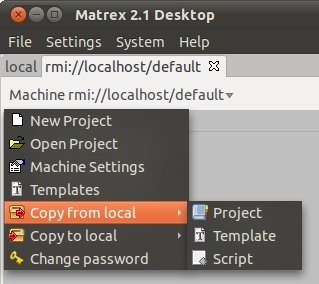
If you connected and logged in correctly, the remote machine tab will appear (here with the top menu open):
The tab caption in this case is rmi://localhost/default. Of this:
- rmi is the network protocol used to interact with the Matrex server (by now RMI is the only option).
- localhost is the address of the computer hosting the Matrex server.
- default is the name of the Matrex server.
Creating a remote project
Clicking on the New Project menu the new project dialog appears. Writing the name of the new project and clicking OK the project is created on the server.
So, there is no need to choose a directory (like for the local
projects), because, to keep things simple, in a server all projects are located in the same
directory (by default srvprj).
Once the project is created its content can be created using the trees in the project's tab.
Opening a remote project
Clicking on the Open Project menu the Open Remote Project Dialog appears, on which you select a project on the server and open it.
At this point you can display and modify its content using the trees in the project's tab.


