Local Projects
The first thing you need to do when you start Matrex for the first time is to
create a project. In the project you will
add matrices, functions, presentations,
charts and timers.
You can create projects locally or remotely.
Creating a local project
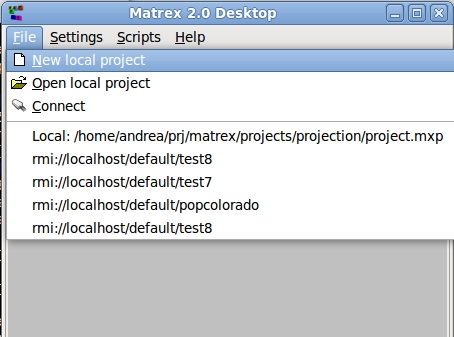
To create a local project, select the menu File -> New local project (this menu is equivalent to the menu New Project in the local machine toolbox).
In the new project dialog that appears you
write the name of the project you want to create.
Clicking the OK button, the Select Base Directory dialog
appears.
Choosing a directory and clicking OK, a new directory with the name of
the new project is created under the selected directory.
For example, naming the project “newproject” and choosing the
directory “/home/user/prj/matrex” , the directory
“/home/user/prj/matrex/newproject” is created. This directory
contains a file called project.mxp , (mxp means Matrex project) with
all the information related directly to the project.
Opening a local project
To open an existing project, select the menu File -> Open local project (again, you can also use the menu Open Project in the local machine toolbox)
In the Open Project dialog that appears you choose the project file
project.mxp, inside the project directory. Clicking OK Matrex
loads the project.
The status of the project loading is displayed as a progress
bar in the project's tab. The progress bar shows how many items of a
certain type (matrices, functions...) have been loaded until now. This can be
useful for big projects or for projects with big matrices, for which the
loading time can be considerable.
When the project has been created or opened, a new tab folder in the current
machine's toolbar shows the content of the project (we call the tab folder
project tab). The File menu contains also a list of the most
recently used projects. Clicking one of these project opens the project.
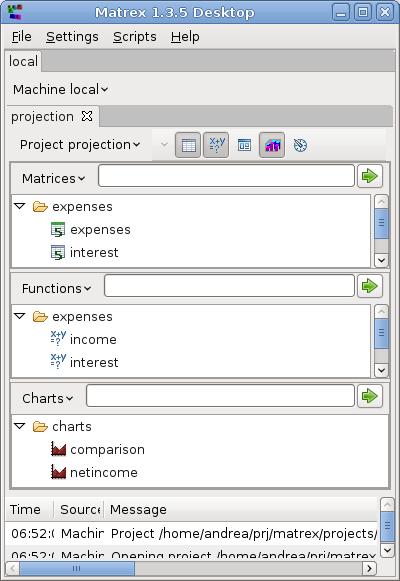
The following picture shows the project “projection”, with some
matrices, functions, and charts.

From the picture it is possible to see that the project
“projection” contains at least:
- the matrices expenses.expenses, expenses.interest, expenses.total
- the functions expenses.income, expenses.interest, expenses.total
- the charts charts.comparison, charts.netincome
Project content modification
You can use the trees in the project's tab to display, add, remove, update the project's items.
In a new project, the first thing to add
is generally a set of matrices. Then
you will add some functions, calculate new matrices and show some of
the matrices in presentations or charts. You can also use timers to recalculate automatically some of the functions, even if
their input matrices don't change.


