The Main Window

Start


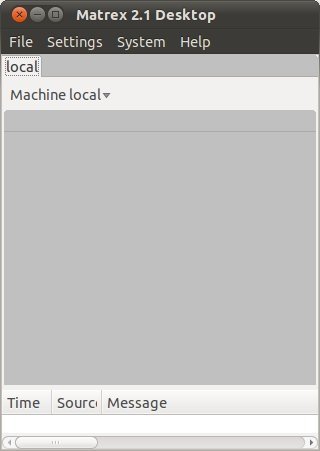
This is the window that appears when the application is started.
It is the "control center" of Matrex.
It is divided in 2 parts: In the machine toolbox you can see a down-arrow button. Clicking on it a menu appears. From it you can change the machine settings and update the templates.
You can find similar menus on the top of the view and on the top of the project tabs.
Being a "control center", this window is not supposed to use the whole screen, therefore maximizing it the window keeps its original width, maximizes its height and is pushed on one side of the screen.

Project creation/opening


The first thing you need to do when you start Matrex for the first time is to create a project. In the project you will add matrices, functions, presentations, charts and timers.
To create a project, select the menu File -> New project.

File Menu

In the new project dialog that appears you write the name of the project you want to create.
Clicking the OK button, the Select Base Directory dialog appears.
Choosing a directory and clicking OK, a new directory with the name of the new project is created under the selected directory.

For example, naming the project “newproject” and choosing the directory “/home/user/prj/matrex” , the directory “/home/user/prj/matrex/newproject” is created. This directory contains a file called project.mxp , (mxp means Matrex project) with all the information related directly to the project.

To open an existing project, select the menu File -> Open project. In the Open Project dialog that appears you choose the project file project.mxp, inside the project directory. Clicking OK Matrex loads the project.
The status of the project loading is displayed as a progress bar in the project's tab. The progress bar shows how many items of a certain type (matrices, functions...) have been loaded until now. This can be useful for big projects or for projects with big matrices, for which the loading time can be considerable.

Progress Bar


When the project has been created or opened, a new tab folder in the current machine's toolbar shows the content of the project (we call the tab folder project tab). The File menu contains also a list of the most recently used projects. Clicking one of these project opens the project.

The following picture shows the project “projection”, with some matrices, functions, and charts.

Machine


From the picture it is possible to see that the project “projection” contains at least:

Project content modification

Once you created a project, you need to populate it. The first thing to add is generally a set of matrices. Then you will add some functions, calculate new matrices and show some of the matrices in presentations or charts. You can also use timers to recalculate automatically some of the functions, even if their input matrices don't change.

Trees

To add, change, view items you need to get familiar with the trees in the main view. Each tree (matrices tree, function tree...) is a panel in the main window that displays all the items of a certain type. For example the matrices tree shows all the matrices.

They are called trees, because the items are disposed in the same way as the files in a file system browser (Windows Explorer, Nautilus), with folders containing other folders and simple items.

For example, the matrix sample.matrices.logresult is represented as the logresult item of the tree, which is contained in the folder matrices; the folder matrices is contained in the folder sample, which is on the top level of the tree.

In a project there are trees for matrices, for functions, for presentations, for charts and for timers. To avoid confusion, it is possible to choose which trees to display, using the show/hide tree buttons on the top of the project tab.  
A tree is visible if and only if the related button is selected. These buttons can be configured using the GUI settings dialog.

Trees

Trees are central in Matrex. Their purpose, in fact, is not only to show the items in the project (or the templates) but:

It is using the trees that you control Matrex, and you do it through popup menus.
Right clicking with the mouse in any tree of the project (as in the templates tree), a popup menu comes up with the actions available for the selected item in the tree.

Popup Menu

To have an idea of what you can do with Matrex, give a look to each tree and its popup menus:

Search in trees

In small projects it is very easy to find items (matrices, functions...) in the trees, thanks to the tree structure. In bigger projects that can become more time consuming.
To solve this problem there is a search bar on the top of each tree:

Search Bar

To find an item in the tree, just write a part of the name-package of the item (separate packages and name using the . character) in the text box and either press enter or click on the arrow button. The first item having a name-package containing that text is displayed and selected. If the item was not visible when you searched for it, the part of the tree containing it is expanded to make it visible.
Examples of search text are:
Pressing enter or clicking on the arrow button again goes to the next item in the tree matching the text in the search bar.

Keys instead of menus

For the most common actions (new, edit, info, remove...) a key or combination of keys can be used instead of the menu, normally a letter or number key together with the Ctrl key.
When this is possible, the combination is written in the menu choice.